Tuesday 20 December 2011

And so - finally - with Blog the Seventh - we get to the Deck Boards !

First, I need to explain what's been happening since the last blog was posted on 18th September !!!

Initially, during the latter part of September, there was progress with the deck, which I am now able to report on; then Jane & I were busy enjoying ourselves, including a very enjoyable trip to "Center Parcs" at Longleat; then we both came down with very bad colds which seemed to drag on for ages, and ages, and during which I did not feel like going outside much. Then, when that cleared up the weather was pretty rotten, so again not much was done outside.

Then we agreed to take up an offer from British Gas to have our cavity walls insulated, and when the surveyor came round he explained that the installers would need access to the inside house wall of our garage, the garage loft and worst of all the garage end wall in the loft inside the house.  All of these areas were, of course, filled up with "stuff" that we have managed to collect over the last 25 years and we therefore needed to divert our attention, from the deck, to having a major clear out, of lofts and garage, before the installers arrived.

After that the weather went bad again, then we both came down with further colds . . . so decking activity has been somewhat slow.

However, that's enough of excuses, let's get on with the report.

So, as mentioned last time, I had ordered some more pea shingle and this is what a Jumbo Bag looks like - 850kg if you recall.


And so here we see the moving and spreading of the pea shingle over the last sections of ground work where earth has been covered with garden membrane.


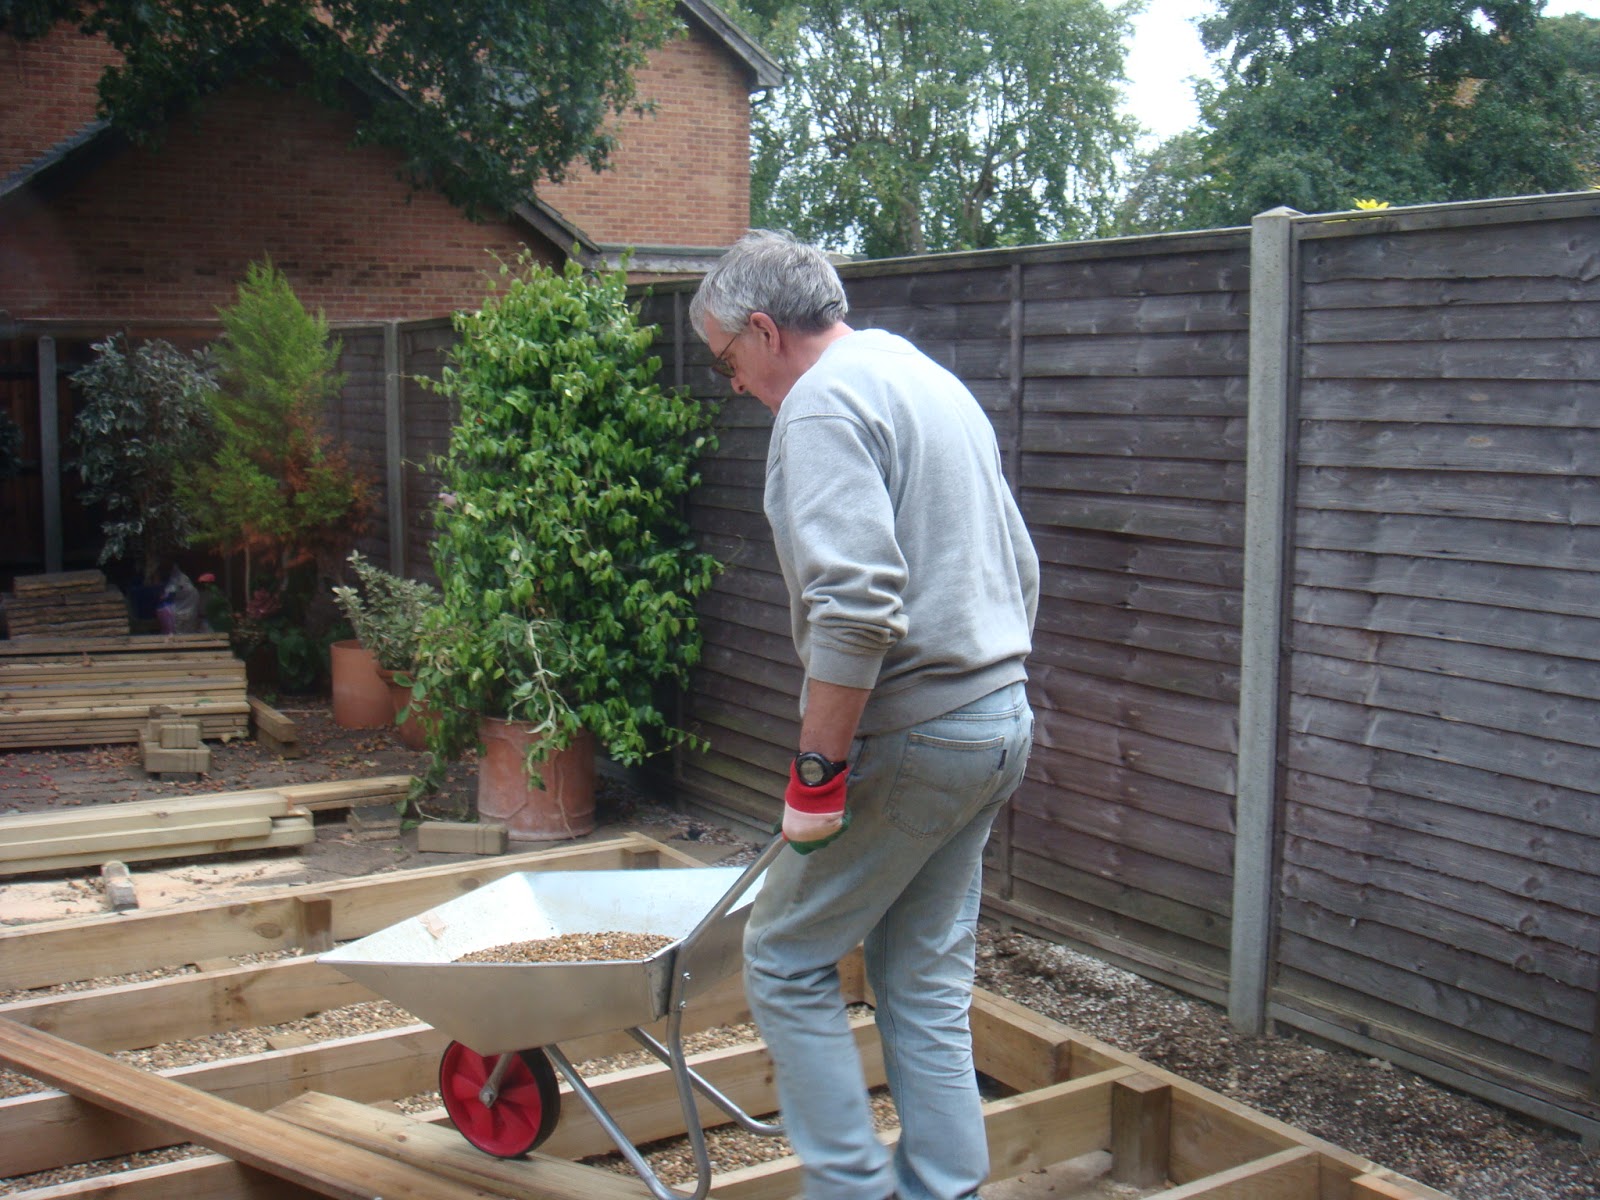
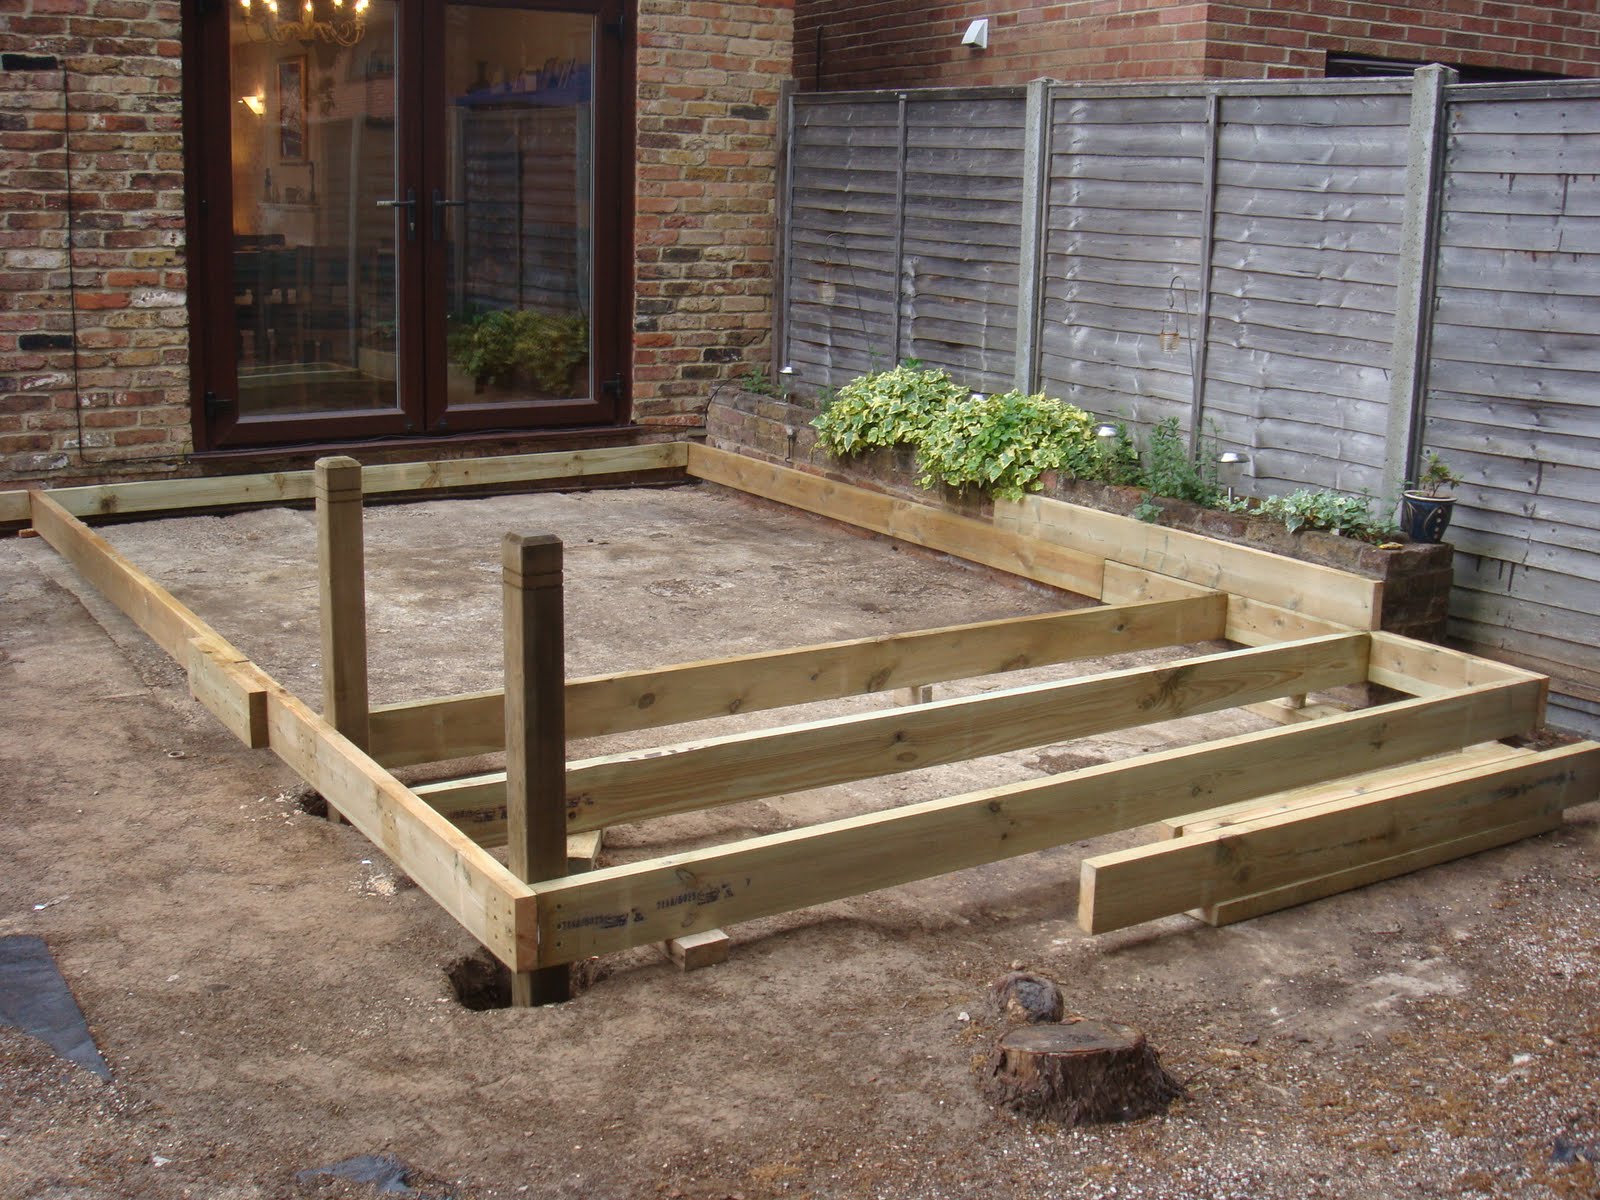
Then, just before I announced the final completion of the basic deck support structure, Jane decided that she wanted a little bit more, in the far corner near the side path entrance; so here is Jane hard at work clearing the ground in preparation for that extra area of deck support.


And here is the final result, at which point, having also completed some repair work of the damp proof concrete flashing and the re-pointing of some cement in fills round the bottom of the garage and French doors, we were finally ready to start putting the top boards in place !!


Those eagle eyed detectives amongst you may notice there appears to be a lot of leaves in this photo; this is because I forgot to take a photo of this area immediately following completion and this is a very recent (out of sequence) photo, by which time the oak trees had started to shed leaves at a serious rate!  By the way the top boards in this shot are merely resting there; they are not screwed down at this point.

Anyway, as previously mentioned, once the supports are all firmly in place, actually screwing down the top boards is quite straight forward; so here is a view of the first few boards finally in place.


And here, below, is shot showing a few more boards in place; and also the tools required for this stage of the work; including tile spacers, which are great for maintaining the required 5mm gap between the boards, and lots and lots of screws, and of course deck seal which needs to be applied to each pilot hole drilled through the deck boards, and to the screws as they are finally screwed home.


And so as the year draws to a close the spread of the top boards grows quite quickly (when the weather permits).


Some time was spent between each top board fitting  session in clearing away the leaves that were now falling, in order to avoid too many leaves being trapped under the deck.

As I write this, it seems unlikely that there will be any further opportunity to get outside, for deck work, this side of Christmas / New Year, as we now have too many other things to do, to get ready for going off to Germany and preparations for other Christmas related events; so this will be it until the New Year when hopefully progress will be more rapid than has been the case over the last few months.


The target is for completion inside the year, from first starting to rip out the old deck; I believe that should be achievable . . . so watch this space.

Merry Christmas and a Happy New Year to all.


Sunday 18 September 2011

In with the New - Third Phase

And so to the Sixth Blog and the Third, and Final Phase, in the basic deck framework construction.

I mentioned in an earlier blog that concreting in posts was made easier by the use of "Postfix" concrete, which I obtained from our local Homebase. Each bag (as shown below) is just sufficient to fix one post (assuming you have dug it the right size and depth).


Here is a close up of a post in a hole ready to be concreted in - as described the trick here is to get the post fixed in position and screwed to the joist before pouring in the concrete mix and adding the water.


Here, below, you can see progress with the final sections of the base; this has involved more hole digging for support posts.


Below you can see the final joists in position and more posts fixed in position and waiting to be cut down flush to the top of the joists; I will then have the final three pieces of post "off cuts" that I need to complete the foundation joist work.


And so (as shown below) with those final three pieces of post in position waiting to be concreted in place, the end approaches for the foundation work.

This shot also shows (in the foreground) the small triangular section of the base as described in an earlier blog.


And finally, with the last posts cut back to joist level, the framework is complete !!


It is this stage that the blog catches up with reality, and we enter the world of "real time";

Up to now, as I am sure you have been aware, the blogs have been a bit behind the actual progress of the work, enabling me to provide regular updates even when nothing much had been happening. From here on the blogs will be produced as the work moves forward, so publication may be less regular - depending on the weather and other priorities !!


As you will note from the above picture I have laid down an area of landscape material, this covers up some bare earth and this in turn will be covered with more pea shingle - I shall be ordering another Jumbo Bag of pea shingle tomorrow and hope to have that delivered later in the week. Once that's down (and I have fixed a bit of loose cement grouting round the bottom of the patio doors) I should be able to start Phase Four - the fixing of the top deck boards !!!  The boards you can see in the shot above are not fixed down; these were just laid in position temporarily to store the garden furniture.

I shall report further once the pea shingle has been delivered and spread out.

Wednesday 31 August 2011

In with the New - Second Phase

And so here we are with Blog the Fifth; and the next phase of the work.

Basically once you have done one section of joist framework, the rest of the base is just a repetition of this; for our base we needed three similar size sections, plus one smaller sized section extending outwards from the first section, plus a triangular shaped section butting on to this; all this will become clear as the work proceeds and you can see the photographs.

So here, in the photograph below, you can see the work proceeding on the second base section (and the completed first section, with some temporary boarding, for the garden furniture, as mentioned in the last blog).


This second section required lots more posts to be dug into the earth as there was much less of the original concrete base in this area.


 Each post hole was dug to about 75 cm (2.5 ft) and then had a half brick placed in the bottom so the posts did not stand directly on the earth; then once the posts were concreted in (see earlier blog) the tops were cut back to the level of the joists and then treated with decking preserver (very important).


Here (above) we see the work progressing on the third section of base; having initially placed the joists in position in order to determine exactly where the posts needed to be dug, the joists were then removed and the posts holes dug.


The third section outside edge (nearest the fence) required a couple of supporting posts, in the corner and along the edge, over the existing concrete base. So holes had to be dug through the concrete ! Even though I was wearing safety specs, over my own specs, I sustained some damage from flying concrete chips, as may be seen in this photograph.


However the work continued and here (below) you will see the third section of base more or less complete.
The posts waiting to be cut off are indeed shorter than before; this is because the posts were originally long enough to be balustrade supports and I was thus able to cut them down and use each one for two posts.


If you look closely at the second section of base (nearest the camera in the shot above) you will see some of the pea shingle; this has been laid over the heavy duty landscape (porous) material which has been laid over sections of exposed earth to prevent weed regrowth. 850kg of pea shingle covers a lot of ground, but I shall need another jumbo bag before we are finished.

So this brings us almost to the end of the build of the three basic frame sections (although I still need to add some extra support in the middle of the joists that are over the original concrete base for which joist "off cuts" will be used).

Come back to this site soon for further exciting progress reports about this project.

Wednesday 17 August 2011

In with the New - The Start

And So to Blog the Fourth.

Here you see the very start of the basic framework for the first deck section which I have been able to screw to the house wall (below the damp course) and to the decorative brick wall to give a good solid foundation.


Away from the house as the ground drops away it was necessary to support the deck joists with posts dug into the ground and cemented; for the initial posts I used bags of ready mixed concrete from Wicks (add water and shovel into hole), later I discovered Home base had bags of special post fixing material (poor some water into hole add the ready mix, add more water and more mixture until the hole is full . . . much quicker !).


The trick with putting in posts is to support the deck joists in the correct position (with temporary chunks of wood) and then attach the posts to the joists and then fill in the holes with concrete and allow to set.


Nearer the house where we had the original concrete patio, the joists can be supported on off cuts of wood (suitably treated with deck preserver) resting on the concrete foundation.


And so with the aid of my trusty cordless screw driver the first section of deck framework nears completion.
At this point we were expecting visitors (Ann & Bill and Ryan from Newcastle) so as a temporary expedient we laid some deck boards over this first section of the framework so we had somewhere to sit out if the weather permitted.  

Watch out for further exciting episodes to be posted . . . soon.


Sunday 31 July 2011

Decking; Joists; Support Posts; Pea Shingle and Porous Membrane !!

Here is Blog the Third

So, having got rid of the old deck; it was time to turn our attention to the ordering and receiving of materials for the replacement version. We had much advice about decking materials, particularly the actual decking boards, but we decided against one of the  most expensive decking boards known to mankind, otherwise known as Kebony; we did look at this, but at over £60.00 per 4.8 metre deck board we thought this was not for us (we needed 70 of these long boards plus some shorter ones; so going for the Wickes offering with a 33% discount for bulk purchase at £8.68 each for the long boards turned out quite a bit cheaper; I will leave you to do the maths !).

Also, as indicated by the title of this blog, we needed quite a lot more than just the top layer of deck board; and our initial Wickes shopping list was for:-

70 x 4.8 metre deck boards; 20 x 3.6 metre deck boards; 44 x 3 metre heavy duty decking joists; 15 x 1.2 metre decking posts; 6 rolls of Heavy Duty Landscape Fabric; 1 x Jumbo Bag of Pea Shingle; 1 x Large Tin of Clear Decking Preserver.

As this was rather a large order, and Wickes will only deliver to the kerbside, we asked for this order to be split into two consignments; in theory giving us a rest between deliveries and a chance to get started on some of the ground work before the decking boards arrived !!

Regrettably, when the day for the first delivery arrived we found that the driver had got our complete order - except for 1 of the shorter deck boards and the Pea Shingle - so rather than send him away we accepted the whole order and then had to spend several hours moving everything to the back garden.

Having had a chance to look at the actual deck boards during this process, we noticed that quite a number were not acceptable, with large knot holes and large splits and other unsightly markings.

So, we called them up and listed the boards we thought were unacceptable (15 of the long boards and 10 (50%) of the shorter boards). Somewhat surprisingly, and this is where Wickes was very good, our opinion was not questioned and Wickes agreed to replace all the faulty boards when delivering the outstanding items.

They also agreed to take away the faulty boards, and we therefore carried these 25 boards back out the front for the next scheduled delivery; this time, although the driver had our replacement boards, and the missing 3.6m board, (and some concrete fence posts that we had not ordered and which we rejected), he still had no pea shingle and, worse than that, he had had no instructions to take away any faulty material; so we had to carry both new good boards and old faulty boards back to the rear garden.


The saga regarding the delivery of the pea shingle then went on for a further few weeks (during which period we had visitors) but finally it was delivered and all materials were to hand for the project.

The pictures below were taken before the arrival of the pea shingle, so if you could use your imagination for a Jumbo Bag that would be helpful !


So now we have removed the old deck, and have all the materials for the replacement project to start; I also bought myself a new cordless drill/screw driver (and a large tub of external grade screws), and a large mains powered circular saw (with laser guide); so watch this space for the start of the re-construction work, in Blog the Forth coming very soon.

Tuesday 19 July 2011

Out With The Old

Just when you thought that this was going to be a single posting blog !! Here, after some delay, is Blog the Second.

In Blog the First, you will have seen what the damaged deck was really like; and will have also heard the story about how it got like that!

So, having tried to patch it up, which did not work, it was agreed that the whole lot would have to be replaced.

Then, just as I was about to start this task; some pipework in our utility room ceiling decided to spring a leak and we had to turn our attention to dealing with that first . . . calling in an emergency plumber and getting in touch with the insurance company, finding a builder to do the repairs etc etc . . . anyway that's another story; and the ceiling gets fixed, the utility room gets repaired, some cupboards get replaced, the whole room gets repainted . . . and the insurance company pays up (following a visit from a loss adjuster, who decided our claim was reasonable and should be paid in full).

Anyway, whilst all that was going on in the background, I got started on pulling up the old decking; and during my first full day at this I managed to remove around 55 square feet which is a bit over 5 sq metres; (and I can image various people reaching for their calculators to check the conversion).


Most of Day 1 was spent removing decking boards that had been screwed down (during our attempts to patch up); rather than the original boards which had all been "nailed down" using an industrial staple gun (much quicker to put down; much more difficult to get up, particularly when the boards have been seriously weakened by damp over a number of years).  And, just to give some idea of the scale of the total job I had undertaken, this Day 1 area represented about 1/11th of the total deck area to be removed.

During Day 2, when I was dealing with mostly nailed down boards, I developed a "leverage" system to prise up reasonable lengths of the old boards (rather than trying to use a crowbar, which tended to just lift up a small piece at a time) . . . see photographs below.  By the end of Day 2 I had increased the lifted area to just over 11 sq metres (about 120 sq ft for those that prefer imperial measures). So Archimedes was right about levers !!


Occasionally I did get some support, and the odd cup of coffee (Note: two cups in the picture below), from the Clerk of Works, who also kept count of the number of boards removed on a daily basis and identified my target for the next day's work !!


By Day 3, having got the hang of the leverage system, I increased my rate of progress and I am pleased to announce that, apart from a weekend off (Malaysian Grand Prix), I managed to complete the whole Stage One process (removing the old decking boards, the original support framework and the original framework support posts) within a total period of 7 working days.

By the way, this also included lifting out and stacking all the rubble, from my old barbecue and adjoining decorative wall, that our original deck installation crew had buried beneath the deck rather than removing; some of the rubble can be seen in the next photograph.


Fortunately this work was done during the time when we had some reasonable weather, with no interruptions for rain, and therefore good progress was made.


One of the tricky bits was finding a place to store the garden furniture - rather than under the trees where the birds tend to use it for target practice - so here it is resting temporarily on the last remaining section of the old decking


For the final sections of deck edging, it was a return to the crowbar, as there was nowhere to get the edge of a lever.


Finally, it was all up and stored in the garden, as one large pile of rubble, one large pile of small pieces of wood, one pile of incomplete deck boards, and one stack of mostly complete deck boards.


Then came the problem of how to get rid of it; the longest desk boards at 3m were too big to go in a skip, and I didn't fancy sawing up more than 60 planks; however an on line search for rubbish clearance led me to Guildford Rubbish Clearance, basically a man with a son and a lorry who turned up on time and loaded up all the unwanted materials and took everything away . . . much cheaper than a skip; and they did all the work  (a bargain !!).


So that's the end of Phase One; next comes the final selection, ordering and receiving of the materials for the new Deck; that will be deck boards, deck joists, support posts, and lots and lots of screws (not a nail is to be used anywhere in this project). Also to be ordered is porous landscape material (definitely not polythene !!) to be laid over the earth, lots of decorative pea shingle to go over that and decking preserver to be used where any boards are cut or drilled into.

In due course come back to this space for more exciting episodes in the great Newsham Road Decking Project. 


Friday 8 July 2011

In The Beginning

OK so the unofficial Michael blog has been rumbled, so as being partly responsible for this I felt the need to carry on the good work started by Michael and bring you regular news about the "Project".

Also the unofficial photographer did have to operate in a rather clandestine manner, whilst I shall be able to bring you a different (closer) perspective on the work in progress.

So I thought for this first blog I would go back to the start and provide some previously unseen "before" images.

As previously explained, the original deck was built just about 10 years ago in time for an earlier significant birthday party for Jane; however the builders did not understand the difference between porous membrane material and plastic sheeting and managed to place plastic sheeting between the original sub frame members and the deck boards (they might have got away with plastic sheeting if they had put this on the ground - to keep the weeds down - but they didn't); consequently when it rained, water collected beneath the deck boards (image a lake) and gradually rotted pretty much everything (over a period of about 8 years) until it started to show and then eventually people started to fall through !! At this point, having replaced quite a few boards, in the hope of saving the deck, we gave up on this approach and decided that the whole thing needed to be ripped out and rebuilt.  And being a retired person with nothing much else to do, it seemed quite clear that I should do this myself rather than getting involved with another bunch of dodgy ne're do wells.

So, and without further ado, here are a few pictures of the beginning of the project or rather the "end of life" of the original deck.


You can see the original deck boards (painted white at some stage) which are well rotted from below; and also some of the replacement boards, that we installed about eighteen months ago.


Laying casually on the rotting deck is one of the small samples of deck boards we obtained to see what we thought we liked.